Workshop Steps
- 0 - Installing Node.js
- 1 - Project setup
- 2 - Install Express
- 3 - Create Server
- 4 - Static Assets
- 5 - Creating Routes
- 6 - Templates
- 7 - Partials
- 8 - Adding the Recipe Page
- 9 - Adding a Database
- 10 - Adding the Recipe Page
- 11 - Adding Admin features
- 12 - Editing a Recipe
- 13 - Working with Markdown
- 14 - Adding a new recipe
- 15 - Delete Recipes
- 16 - And now what?
Useful Links
Step 12 - Editing a Recipe
Ok we have our admin page, so lets create the pages and routes that will let us edit our recipes.
We actually need to set up a bunch of stuff to do this.
- Create and export the database function to update a recipe
- Create a route & template that will display a form for us to edit the specified recipe
- Install some new middleware to handling form data easier
- Create a route for performing the update that uses the POST method
Okay, lets go!
Create updateRecipe function
In recipesDB.js we’ll create a new function for updating a recipe in the database. Unlike before we aren’t going to just pass an id as a parameter, we are going to pass a whole recipe object, then we are going to look up that recipe in the database by its id, copy its name and content content properties to it and write the changes to the database.
This is actually four operations, but we are going to do it by stringing it all together as one chain of function calls. Open up recipesDB.js and add the following function:
function updateRecipe(recipe){
  db.get('recipes')
    .find({id: recipe.id})
    .assign({ name: recipe.name, content: recipe.content})
    .write();
}
We could have also written everything here from db.get to .write(); on a single line. But it would have been very long. Breaking code up over multiple lines like this is often done to make it a little clearer to read.
Don’t forget to add updateRecipe to your module.exports:
module.exports = {
  getAllRecipes: getAllRecipes,
  getRecipe: getRecipe,
  updateRecipe: updateRecipe
};
Create route and template for our recipe editing form
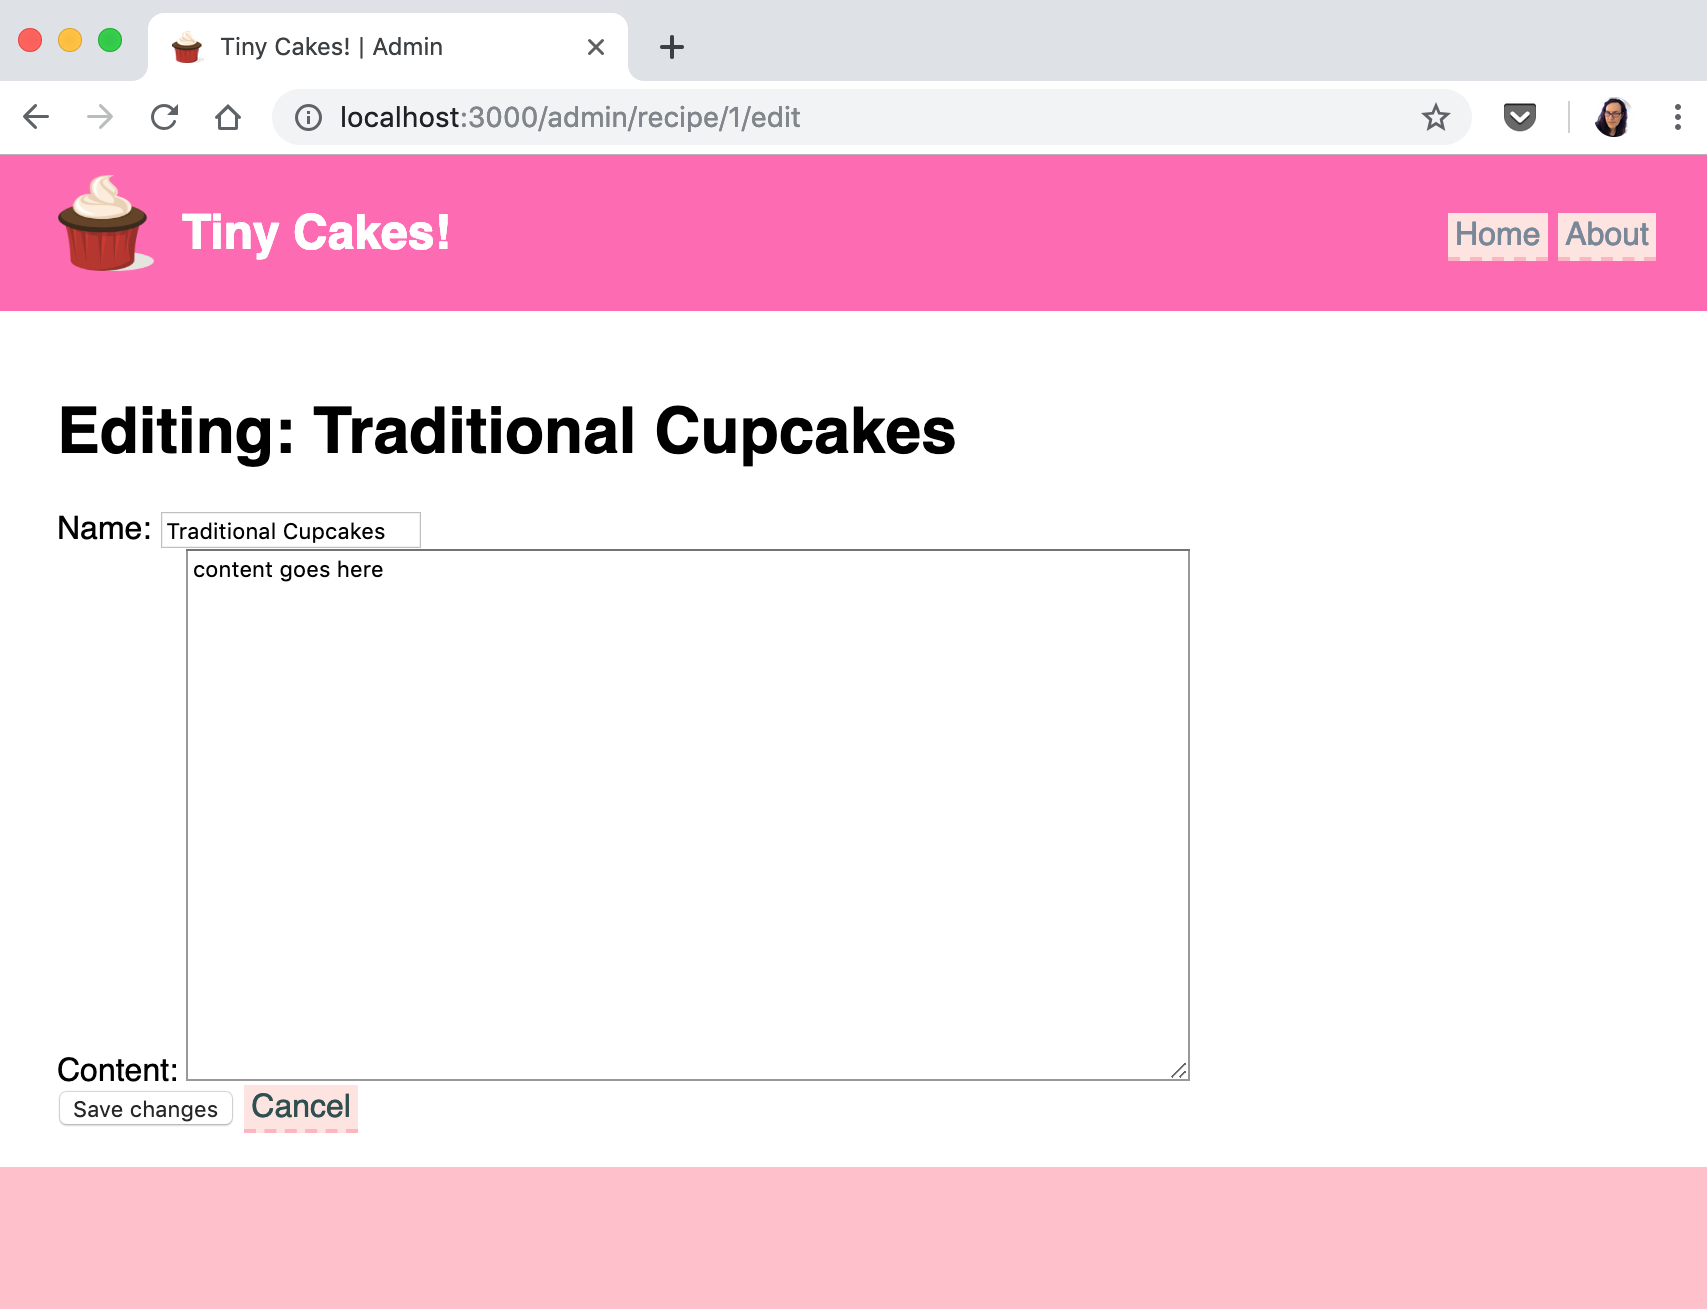
Our URL for editing a recipe is going to be /admin/recipe/:id/edit. It’s going to be a lot like viewing a recipe but using a form instead.
server.get('/admin/recipe/:id/edit', function(request, response){
  var recipe = getRecipe(request.params.id);
  response.render('pages/admin/edit', {recipe: recipe})
});
And the template will be at views/pages/admin/edit.ejs:
<!DOCTYPE html>
<html>
  <head>
    <title>Tiny Cakes! | Admin</title>
      <link rel="stylesheet" href="/tinycakes.css" />
  </head>
  <body>

    <% include ../../partials/header %>

    <div class="container">
      <h1>Editing: <%= recipe.name %></h1>
      <form method="post" action="/admin/recipe/<%= recipe.id %>">
        <% include ../../partials/admin/recipe_form %>
      </form>
  </div>
  </body>
</html>
So notice the <form> tags? Forms are how we put elements like text input fields, buttons, checkboxes and radio buttons into pages. But instead of putting those elements in here, we’ve put them into a partial. We’ve put them into a partial because we are going to use them later.
Create the partial at views/partials/admin/recipe_form.ejs:
<div>
  Name:
  <input name="name" type="text" value="<%= recipe.name %>"/>
</div>
<div>
  Content:
  <textarea name="content" rows="20" cols="80"><%= recipe.content %></textarea>
</div>
<input type="submit" value="Save changes" />
<a href="/admin/">Cancel</a>
In the partial we have a two text boxes: an <input> for the name, and <textarea> for the content. <input> is for a single line of text, and <textarea> is for text with multiple lines.
Then we have another <input> tag. The big difference between these is the type attribute. <input> serves a few different purposes in a form and the type attribute controls what each one does. When type is set to text it’s a single line text box. When type is submit it becomes a submit button which will trigger form submission when clicked. And the last item in the partial is just a link back to the admin page if you want to cancel your edit.
So… clicking the submit button will cause a form submission. What does this mean?
The <form> tag has two attributes: method and action. When the form is submitted the content in the form is collected and a request is sent to the URL from action. This request has the request method of the method attribute and the data collected from the form is embedded in it.
Install form handling middleware
Dealing with form data on the server is kind of awkward to be honest. But luckily someone wrote a really great package called formidable which makes it much easier.
formidable is a middleware which extracts the form data attached to a request, cleans it up and adds it back in a way which is easier to use.
So lets install formidable by going to our terminal (remember to stop your server) and type the following command:
npm install express-formidable --save
Once it has finished installing, open up server.js and do the following:
Import it using require just after the other lines importing with require at the top of the file:
var formidable = require("express-formidable");
Tell your server to use it by adding the following line after the server.use(staticAssets) line:
server.use(formidable();
Now that the formidable middleware has been added lets add our new route which will handle the POST request.
Add route to save changes
Ok last thing, we need to add the route that will handle the form submission when we click save.
First import our updateRecipe function:
var updateRecipe = require('./recipesDB.js').updateRecipe;
Looking at our form, we have the method of POST and an action of /admin/recipe/ plus the recipe id. And, thanks to formidable, the information about our form fields is going to be in request.fields.
So our route will like this:
server.post('/admin/recipe/:id', function(request, response){
  updateRecipe({
    id: parseInt(request.params.id),
    name: request.fields.name,
    content: request.fields.content
  });
  response.redirect('/admin');
});
Add that code to server.js.
Notice how after we call updateRecipe we don’t render a template, we use response.redirect to send the browser back to the admin page at /admin.
Testing it out
Ok so now you should be able to go to http://localhost:3000/admin, click edit for the Traditional Cupcakes recipe and see our editing form.

Try changing the name of the recipe and clicking save.
You will end up back on the Admin page and the name should be updated. Click Home in the navigation and you should see the updated name there too, and if you click on it, the recipe page will have the updated name as well.
So lets update our recipe’s content.
Edit our recipe and add the following to the content of the recipe. Don’t worry about typing this out, just copy/paste it.
Traditional cupcakes are always a crowd-pleaser.

## Ingredients:

 * 2 cups self-raising flour, sifted
 * 3/4 cup CSR Caster Sugar
 * 2 eggs, beaten
 * 3/4 cup milk
 * 125g butter, melted, cooled
 * 1 teaspoon vanilla essence
 * Sprinkles, to decorate
 * 1 1/2 cups CSR Pure Icing Sugar
 * 1-1 1/2 tablespoons water
 * food colouring, optional

## Method:

1. Preheat oven to 200°C or 180°C fan-forced.
2. Grease a 12 x 1/3-cup capacity muffin pan. Alternatively, line holes with paper cases.
3. Combine flour and caster sugar in a bowl. Make a well in the centre.
4. Add milk, butter, eggs and vanilla to flour mixture. Using a large metal spoon, stir gently to combine.
5. Spoon mixture into prepared muffin pan. Bake for 12 to 15 minutes, or until a skewer inserted into the centre comes out clean.
6. Stand in pan for 5 minutes before transferring to a wire rack to cool.
7. Make icing:
  1. Sift icing sugar into a bowl.
  2. Add food colouring and water.
  3. Stir until smooth and well combined.
8. Spoon icing over cupcakes.
9. Decorate with sprinkles.
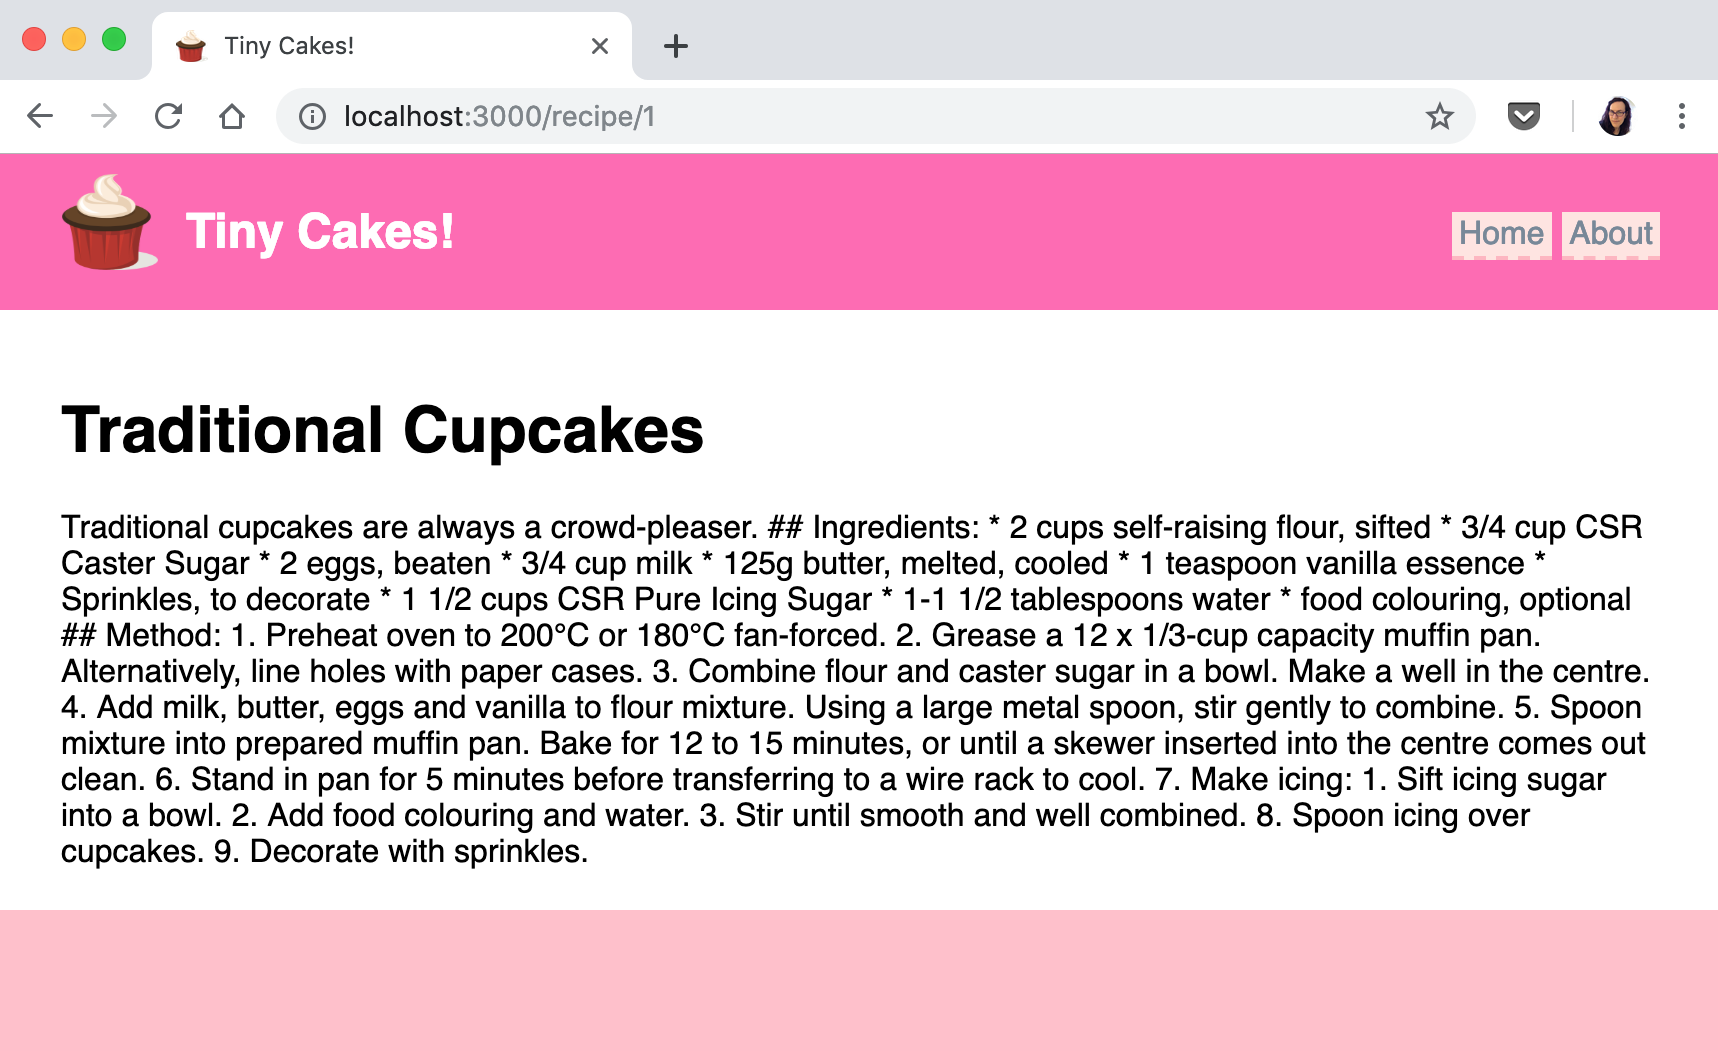
Save it and check the recipe page.
It is going to look like this:

And that isn’t what we want. It’s just all the text run together without any HTML markup.
Let’s look at how to fix that in the next step.
 Muses Code